Codes for different boards and shields.
All codes only work with MQTT.
ESP8266.txt (1.8 KB)
Arduino_Industrial_101.txt (1.0 KB)
EthernetShieldW5100.txt (2.1 KB)
EthernetShieldW5200.txt (2.3 KB)
EthernetShieldW5500.txt (2.3 KB)
MKR1000.txt (2.4 KB)
ManualConnection.txt (3.0 KB)
WiFi101Shield.txt (2.4 KB)
WiFiShield.txt (2.2 KB)
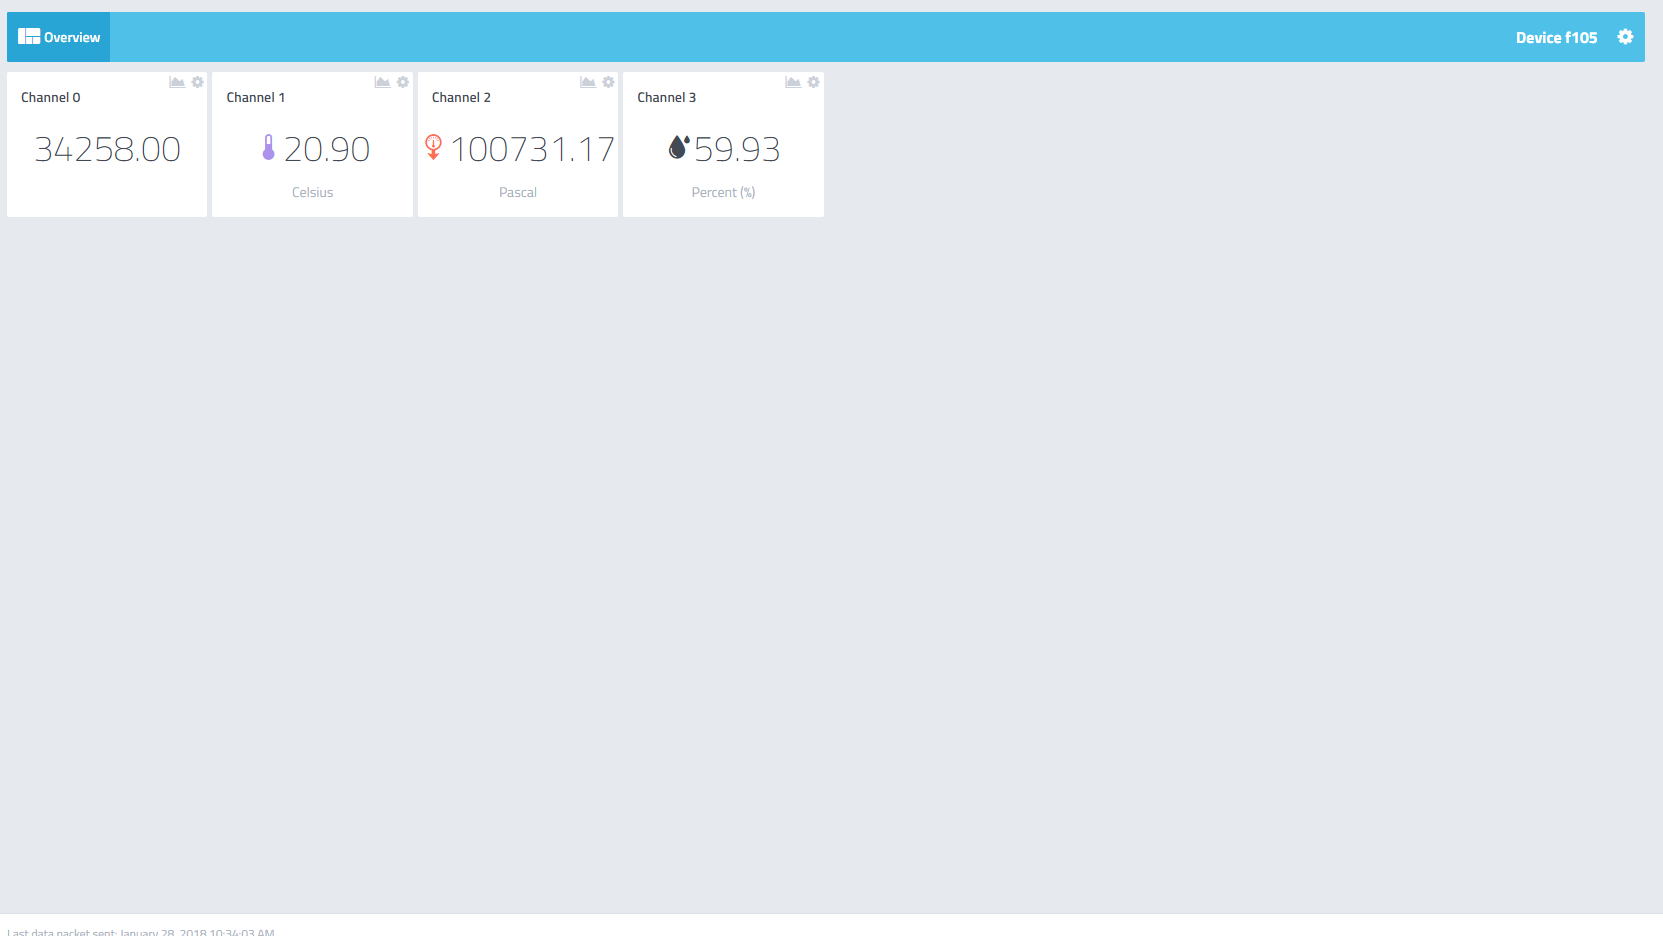
Sample from the Cayenne Dashboard.
1 Like
Hi
Is there a BME280 download for the ESP32 board?
No, but I’ll write it for you in 24h.
Spectacular! Thanks very much. I’m in no rush since my BME280 hasn’t arrived yet
1 Like
Try this, but I do not know if it works because I do not have ESP32.
/*
This example shows how to connect to Cayenne using an ESP32 and send/receive sample data.

The CayenneMQTT Library is required to run this sketch. If you have not already done so you can install it from the Arduino IDE Library Manager.

Steps:
1. If you have not already installed the ESP32 Board Package install it using the instructions here: https://github.com/espressif/arduino-esp32/blob/master/README.md#installation-instructions.
2. Select your ESP32 board from the Tools menu.
3. Set the Cayenne authentication info to match the authentication info from the Dashboard.
4. Set the network name and password.
5. Compile and upload the sketch.
6. A temporary widget will be automatically generated in the Cayenne Dashboard. To make the widget permanent click the plus sign on the widget.
*/

//#define CAYENNE_DEBUG
#define CAYENNE_PRINT Serial
#include <CayenneMQTTESP32.h>
#include <Wire.h>
#include <Adafruit_Sensor.h>
#include <Adafruit_BME280.h>
#define I2C_SDA 32
#define I2C_SCL 33

Adafruit_BME280 bme(I2C_SDA, I2C_SCL);

// WiFi network info.
char ssid[] = "ssid";
char wifiPassword[] = "wifiPassword";

// Cayenne authentication info. This should be obtained from the Cayenne Dashboard.
char username[] = "MQTT_USERNAME";
char password[] = "MQTT_PASSWORD";
char clientID[] = "CLIENT_ID";

void setup() {
	Serial.begin(9600);
	Cayenne.begin(username, password, clientID, ssid, wifiPassword);
  bme.begin(0x76);
}

void loop() {
	Cayenne.loop();
}

// Default function for sending sensor data at intervals to Cayenne.
// You can also use functions for specific channels, e.g CAYENNE_OUT(1) for sending channel 1 data.
CAYENNE_OUT_DEFAULT()
{
	// Write data to Cayenne here. This example just sends the current uptime in milliseconds on virtual channel 0.
	Cayenne.virtualWrite(0, millis());

  Cayenne.celsiusWrite(1, bme.readTemperature());
  Cayenne.virtualWrite(2, bme.readPressure(), "bp", "pa");
  Cayenne.virtualWrite(3, bme.readHumidity(), "rel_hum", "p");
}

// Default function for processing actuator commands from the Cayenne Dashboard.
// You can also use functions for specific channels, e.g CAYENNE_IN(1) for channel 1 commands.
CAYENNE_IN_DEFAULT()
{
	CAYENNE_LOG("Channel %u, value %s", request.channel, getValue.asString());
	//Process message here. If there is an error set an error message using getValue.setError(), e.g getValue.setError("Error message");
}
2 Likes
Thanks very much. My BME280 hasn’t arrived yet, but when it does, I’ll let you know how it works.
2 Likes
Hello works great so far for my ESP 8266. Would like to add a deep sleep mode but cannot handle to find the right place for it to get it work… Would be great if you could help me. Thanks.