About This Project


Gardening is very long task taking time every day .
In this tutorial i will show how to make everything automated in a easy way
What’s Connected
Order:
-Arduino uno
-Raspberry pi any should work
Ethernet shield arduino
-Relay
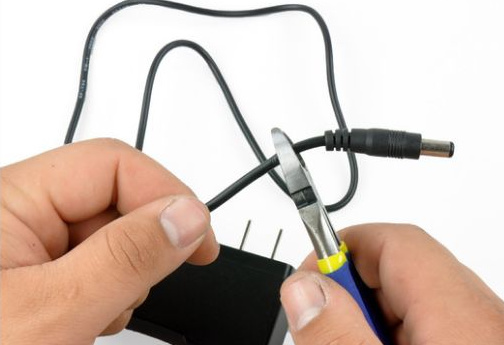
-Wire i like these wire they are already cut in different size but it’s obviously optional
-PhotoResistor
-Soil moisture
-Water pump
-Pipe
-FAN i used the one from an old computer: (zalman)
-Transistor
-Light
-Humdity/temperature sensor
-Raspberry pi camera
-SD card 16GB 8Gb would work but will be short for timelapse
Setting Up the Arduino


In order to monitor our farm i took few device wich can be helpful.
Before to start, remenber to connect the ethernet shield to the arduino
Soil moisture:
To check if the plants need water
VCC: 5v
GND:GND
A0: A1
The Fan:
if it’s get to hot it will activate or just to give some fresh air.
- One wire goes from the resistor to pin 3
-The GND of the fan goes on the middle pin of the transistor.
The + of the fan goes to the relay (middle pin) The last pin of the transistor goes to gnd
The diode goes to the midlle pin of transistor and to the GND
The water pump:
will activate with the soil moisture
the + goes to midlle on the relay and GND to GND of the power source
Photoresistor(optional):
This part will allow us to mesure if there is enough light in the room One part is connected to A0 with the resistor connected to the ground. The other one to the 5v
The anode(+) goes to the relay The other to the GND of the power supply
LIGHT:
The anode(+) goes to the relay The other to the GND of the power supply
Humidity /temperature sensor:
Some code are required for this device in order to work properly with Cayenne
VCC: 3.3V
GND:GND
DAT: digital pin 8
Water level sensor:
VCC:5V
GND:GND
SIG:A2
Final Mounting

See the final schema.
I used 2 relay in the graphic fritzing does not have relay 4channel yet.
Important for the relay i used only one 12v power supply , i separate the wire positive and negative then solder 3 wire from the positive and connect each part on the relay.
One is enough as everything does not turn on at the same time.
I used a 5v power supply for the arduino
RELAY:
VCC: 5V
GND: GND
IN1: PIN2 Activate the light
IN2: PIN5 Activate the water pump
IN3: none IN4
PiN4: activate the FAN
Cayenne Pre Required
Here we gonna see how to configure cayenne which is very easy.
First create an account Here.
Then you should have you ethernet shield with Rj45 cable connected .
Here is the code to connect to cayenne and also to configure the hum/temp sensor
This code work for the w5100 shield the code is available on cayenne for other ethernet/wifi shield
Also don’t forget to add your token you get it after creating your account.
#include "DHT.h"<br>//#define CAYENNE_DEBUG         // Uncomment to show debug messages<br>#define CAYENNE_PRINT Serial  // Comment this out to disable prints and save space
#include </p><p>#define DHTPIN 8     // what digital pin we're connected to
#define DHTTYPE DHT22   // DHT 22  (AM2302), AM2321</p><p>#define VIRT_TEMP V1
#define VIRT_HUM V2</p><p>// Cayenne authentication token. This should be obtained from the Cayenne Dashboard.
char token[] = "your toker";</p><p>DHT dht(DHTPIN, DHTTYPE);
unsigned long prev_DHT_refresh, interval_DHT_refresh = 1000;</p><p>void setup()
{
  Serial.begin(9600);
  Cayenne.begin(token);</p><p>  dht.begin();
}</p><p>void loop()
{
  Cayenne.run();  getDhtValues();
}void getDhtValues() {
unsigned long now = millis();
  if (now - prev_DHT_refresh > interval_DHT_refresh) {
    // Reading temperature or humidity takes about 250 milliseconds!
    // Sensor readings may also be up to 2 seconds 'old' (its a very slow sensor)
    float h = dht.readHumidity();
    // Read temperature as Celsius (the default)
    float t = dht.readTemperature();</p><p>    // Check if any reads failed
    if (!isnan(h) && !isnan(t)) {
      Cayenne.virtualWrite(VIRT_HUM, h);
      Cayenne.celsiusWrite(VIRT_TEMP, t);
    }
    prev_DHT_refresh = now;
  }
}
Configuration Cayenne:


We almost done for arduino and now it’s the easy part.
We gonna add all the devices on cayenne check the picture.
-
GO to add device
-
Custom widget
-
Select the kind of widget you like. I used chart for humidity and water level otherwise i used value
4)For the humdity temp sensor we use virtual pin
Temp : Vpin1
Humidity : VPin2
For the other device instead of choosing virtual pin take Analog with the pin link to it
also the data will be voltage.
Relay:
Same procedure but this time in actuators then select the pin of the arduino connected to the relay for the light/fan/water pump
Event and Trigger


Now that we have the dashboard we gonna finish the configuration
Trigger:
water pump:
This will turn on the pump when the soil moisture detect it’s to dry.
Notice i used 2 trigger one to start the water pump and to stop
Water level:
When the value is high means water is missing
Here we will receive an email to alert us
Event:
I set up 4 Event one to start the light in the morning and one to stop it in the evening
And 2 for the fan on/off.
Raspberry:


Let’s do a timpelpase of the plant growing
3 Software:
-Raspbian
-Win32diskimager to burn the image on the SD card
-Putty to connect in remote to the raspbery
WIn32 disk imager:
After download install it. Open it ,
1/ you will see “device” in general the default is good (if you only have the sd card connected)
2/ Click on the blue icon folder and select the raspbian jessie image you have downloaded
3/ Click write and it’s done. You can now insert the card to the raspberry.
Putty:
It allow us to connect via SSH , open Putty (no need to install)
-Connect internet cable to the raspberry
-You need to find the ip of the raspberry 2 easy way :
-Connect to your box interface you will be able to see the device with the IP
-Connect the touchscreen and keyboard go to terminal then ifconfig Now in Putty enter the ip adress will be something like 192.168.0.3 then enter
-it will ask to trust click yes (picture)
-login : pi password : raspberry Leave the windows on the side we will come back here later
Now that we have the raspberry running few update are needed so in putty copy paste the command:
sudo apt-get update


sudo apt-get upgrade
VNC:
if you dont have a screen to connect your raspberry install vnc to remote controle
sudo apt-get install tightvncserver
when finish to start the server:
vncserver :1
and download vncviewer on your computer to connect enter Ip and number server
it will look like this 192.168.0.3:1
Cayenne:
You can take remote control of you raspberry with cayenne, only have ton install it:
wget https://cayenne.mydevices.com/dl/rpi_03wl1tt4nt.sh
sudo bash rpi_03wl1tt4nt.sh -v
Timelapse


Last step !
We can now enable the camera to do so in putty or in a terminal paste:
sudo raspi-config
then go to enable camera.
We have to create a folder to store the picture
cd /home/pi/Desktop

mkdir timelapse
After pluging the webcam we gonna create a script to take picture every hour.
cd /home/pi/Desktop

nano timelapse.sh
Paste this:
SAVEDIR=/home/pi/Desktop/timelapse/

while [ true ];

do filename=-$(date -u +"%d%m%Y_%H%M-%S").jpg
/opt/vc/bin/raspistill -o $SAVEDIR/$filename
sleep 3600;
done;
And to make sure the script is executable
chmod +x timelapse.sh
Conclusion:


The tutorial was long but very easy just few device to connect and configure the platform.
On the picture is a big mess i use to long wire .
I will post the result of my timelapse when the plants are done growing
Advice:
The ethernet shield can get the error dhcp fail when tryng to connect i found the solution on arduino forum
You have to solder two 100ohm resistor.